Posts

Showing posts from October, 2010

Mercedes Benz replacement speakers

Image
Replacement Speakers Replacement speakers for mercedes benz becker Autosound car stereo car radio accessory Part# SPK.164.917 70mm x 250mm 2 3/4 x 9 3/4 Dash 110/111/112/113 Part# SPK.018.872 95mm x 210mm 3 1/2 x 8 1/4 Dash 108/114/115 Rear 280SE / 600 Part# SPK.4x6A OVL 4x6 Oval Speaker with Grill Kick Panel Stereo Ver. 280SE *sold in sets only   Part# SPK.4x6A.RPL 4x6 Oval Speaker Replacement for 280SE Kick Panel *shallow mounting depth small magnet Part# SPK.163.007 100mm Round Kick Panel with Grill 113 Stereo Ver. *sold in sets only Part# SPK.100.RPL
ISO connector panasonic car stereo wiring installation kits

Image
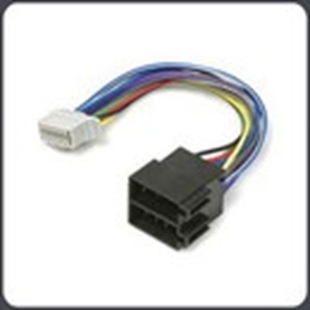
ISO 16 Pins Connector Adapter For Car Radio Panasonic car stereo installation kits Cable connection with nine 16-pin connector for Panasonic car radio and CD players to the vehicle's ISO connector dimensions of the connector : 22x11mm Iso connectors Liste of compatible car radios: Series C-CQ: CQ-C1001NE, C1001NW CQ-, CQ-C1011NE, C1011NW CQ-, CQ-C1021NE, CQ-C1021NW, C1100VN CQ-, CQ-C1103NE, CQ-C1103 NW, CQ-C1110AN, CQ-C1110GN, C1-113NE CQ, CQ-C1113NW, CQ-C1115N, CQ-C1120AN, CQ-C1120G N-C1123NE CQ, CQ-C1123NW, C13-00AN CQ, CQ-C1300GN, C1301NE CQ-, CQ-C1301NW, CQ-C1303 NE-C1303NW CQ, CQ-C1311NE, C1-311NW CQ, CQ-C1312NW, C1313NE CQ-, CQ-C1313NW, CQ-C1315 N-C1321NE CQ, CQ-C1321NW, CQ-C13 23NE, CQ-C1323NW, CQ-C1325N, CQ-C1400N, CQ-C1415N, CQ-C1425N, CQ-C1465N, CQ-C1475N, CQ-C1505N, CQ-C3100AN, C3100GN CQ-, CQ-C3100VN, CQ-C3300 N, CQ-C3301N, CQ-C3305N, CQ-C3355 N, CQ-C3503N, CQ-C5100n, CQ-C5300N, CQ-C5301N, CQ-C5303N, CQ-C5355N, CQ-C5400N, CQ-C730

mercedes Audio & COMAND remove inslall

Image
Installing and Removing marcedes COMAND & Audio on models E & CLS Firstly remove the wooden surround panel around the gearstick. On the W211 E class you just pull up the front edge (it is hooked in at the rear edge), and the whole panel comes up. On the W219 CLS it is easier to leave the wood surround in place and pull up the metal surround of the actual gear lever, then you can reach through the hole and push the catches (you can feel one at each end of the front edge of the trim) whilst pulling the wood trim up from the front. Once the panel is pulled up, you can see a knurled plastic nut at the bottom of the gearknob itself, rotate anti-clockwise, unplug all the wires connected to the panel and then pull the gearknob upwards and remove the panel. Now you need to release the catches that hold the ashtray in place, there are two and they clip slightly forward using a screwdriver, whist applying pressure with the screwdriver pull the ashtray upward. Unplug the blu

Clarion car stereo iso connector

Image
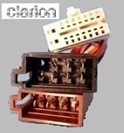
Iso connector adapter 16 pin car radio Clarion cables and accessories Dimensions of the white connector that plugs into your car stereo: 22 mm x 10 mm Fits the following radios: AX948RMB / AX 5555 R ADX 55 RZ / RZ 628 ADX CRX87M / CRX97RM / CRX121RM / CRX123RM DB238R / DB338RB / DB348RMP / DB358RMP / DB359RMP / DB538RMP / DB568RUSB DXZ438R / DXZ538R / DXZ635MP / DXZ648RMP / DXZ718R / DXZ728R / DXZ738R / DXZ748MP / DXZ748RMP / DXZ758R / DXZ768RMP / DXZ828R / DXZ828RX / DXZ838RMC / DXZ838RMP / DXZ848RMP / DXZ848RMC / DXZ858RMP / DXZ928R / DXZ928RX / DXZ938R / DXZ948RMP / DXZ958RMC MAX668RVD MRX 8675 RZ PX2   Iso connector | car stereo equipment | Sound Automotive

make audio files compatible withautoradio

Image
Make it compatible audio files to a car radio Problem I transferred all my music from my computer on my USB stick. When I connect to my computer, I identify elements 804 and go 3.59 disponible. All transferred songs are visible, but when I connect my key in my car, it says that my key is empty ... Solution Format your key in FAT32 Unless you have an iPod compatible car stereo directly, it should read that the PC formats: NTFS and FAT32. The problem of NTFS is that Mac does not know natively written on, unless you use a utility such as NTFS-3G MacFuse or Paragon NTFS for Mac. Advantage of FAT32: it is run by Mac and here's how: Run "Applications / Utilities / Disk Utility" Select the tab "Partition" Select the USB drive (the first icon that is to say that showing the key size) Choose "Partition A" for field "Volume Configuration" (do not leave this field to "Current" if t

How to install a GPS Pioneer AVIC D3BT on Vito

Image
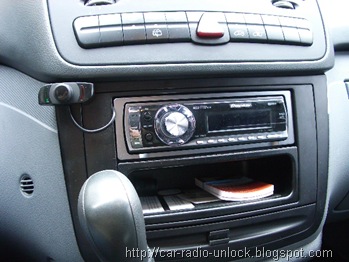
TUTORIAL for installing a GPS Pioneer AVIC D3BT on Vito I had promised, after installing the HP modif spacers, that the installation of double din GPS Pioneer ... Configuration before: Radio CD iPod + Parrot hands free kit + GPS phone. Lots of yarn, not too friendly ... Removing the radio and CD kit Parrot Removing the original frame (no screws, just a screwdriver on the side undoes the notches for plastics) Remove the old double DIN bracket (4 screws) Place the microphone (it's a version with optional Bluetooth AVIC) and cause the wire behind the amount of plastic that frames the door After taking the proper guidance (this is not a simple thing with Pioneer ...), We ask and we set the frame that will keep the GPS Avic D3BT . It connects the pin on the pioneer radio harness mercedes, and it brings all the necessary son. It also takes the opportunity to plug the CPU power supply bluetooth on an electrical control of the radio b